福州做网站开发需要多少钱百度输入法免费下载
利用梯度上升可视化卷积核
文章目录
- 前言
- 基本原理
- 版本和包
- 结果展示
- 简单绘图
- 修改源码绘图
- 方法一
- 方法二(推荐)
- 报错解决
- 总结
前言
基于梯度上升的可视化是一种常用的技术,用于理解卷积神经网络(CNN)中的卷积核是如何对输入图像进行特征提取的。该方法可以通过最大化卷积层输出的激活值来生成图像,从而使得卷积核对特定特征更加敏感。
基本原理
以下是基于梯度上升可视化卷积核的基本原理步骤:
- 选择目标卷积层和卷积核:首先,选择你希望可视化的目标卷积层和对应的卷积核。通常选择靠近网络顶部的卷积层,因为这些层对于更高级别的特征有更强的响应。
- 定义损失函数:为了最大化卷积层的输出激活值,需要定义一个损失函数。通常使用该卷积层的平均激活值作为损失函数。
- 随机生成图像:从随机噪声图像开始,作为初始输入图像。
- 前向传播:将生成的图像输入到CNN网络中,并进行前向传播,记录目标卷积层的输出激活值。
- 反向传播:计算损失函数对于输入图像的梯度,即目标卷积层输出激活值对于输入图像的影响。
- 更新输入图像:根据梯度信息更新输入图像,使得激活值增大。
- 重复步骤4-6:重复进行前向传播、反向传播和图像更新,直到达到预定的迭代次数或满足特定的停止条件。
- 可视化结果:最终生成的图像即为可视化结果,它代表了卷积核对于特定特征的响应模式。
通过这个过程,可以逐步调整输入图像,使得卷积核对于特定特征更加敏感。这种方法可以帮助我们理解卷积神经网络学习到的特征,以及卷积层如何对输入图像进行处理。
版本和包
python=3.7
torch=1.7
flashtorch=0.1.3
其中flashtorch就是用来求取中间层梯度上升的包
结果展示


简单绘图
官方代码如下所示:
(以vgg16为例子)
import torchvision.models as models
from flashtorch.activmax import GradientAscentmodel = models.vgg16(pretrained=True)
g_ascent = GradientAscent(model.features)# specify layer and filter info
conv5_1 = model.features[24]
conv5_1_filters = [45, 271, ]## 这里调节要展示的卷积核(绘出子图的个数),最大值是对应权重的通道数vis = g_ascent.visualize(conv5_1, conv5_1_filters, title="VGG16: conv5_1",return_output=True)
以上代码,用vis即可画图。
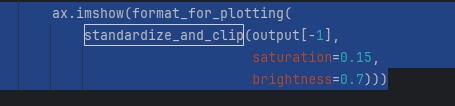
vis =【output45,output271】的列表,每个都包含很多层,源代码是用的最后一层进行绘图(下图为源码截图):
修改源码绘图
方法一
由于官方代码画不出来图,所以修改from flashtorch.activmax import GradientAscent 的源码,把plt返回即可:
找到GradientAscent函数(gradient_ascent.py) 第211行

修改为:
if return_output:return self.output, self.plt
方法二(推荐)
最好的方法是:在同级目录下新建文件grad_as.py
直接把以下代码复制到grad_as.py里:
import numpy as np
import matplotlib.pyplot as pltimport torch
import torch.nn as nnfrom flashtorch.utils import (apply_transforms,format_for_plotting,load_image,standardize_and_clip)class GradientAscent:"""Provides an interface for activation maximization via gradient descent.This class implements the gradient ascent algorithm in order to performactivation maximization with convolutional neural networks (CNN).`Activation maximization <https://pdfs.semanticscholar.org/65d9/94fb778a8d9e0f632659fb33a082949a50d3.pdf>`_is one form of feature visualization that allows us to visualize what CNNfilters are "looking for", by applying each filter to an input image andupdating the input image so as to maximize the activation of the filter ofinterest (i.e. treating it as a gradient ascent task with activation as theloss). The implementation is inspired by `this demo <https://blog.keras.io/category/demo.html>`_by Francois Chollet.Args:model: A neural network model from `torchvision.models<https://pytorch.org/docs/stable/torchvision/models.html>`_,typically without the fully-connected part of the network.e.g. torchvisions.alexnet(pretrained=True).featuresimg_size (int, optional, default=224): The size of an input image to beoptimized.lr (float, optional, default=1.): The step size (or learning rate) ofthe gradient ascent.use_gpu (bool, optional, default=False): Use GPU if set to True and`torch.cuda.is_available()`.""" # noqa##################### Public interface #####################def __init__(self, model, img_size=224, lr=1., use_gpu=False):self.model = modelself._img_size = img_sizeself._lr = lrself._use_gpu = use_gpuself.num_layers = len(list(self.model.named_children()))self.activation = Noneself.gradients = Noneself.handlers = []self.output = Noneself.plt = None@propertydef lr(self):return self._lr@lr.setterdef lr(self, lr):self._lr = lr@propertydef img_size(self):return self._img_size@img_size.setterdef img_size(self, img_size):self._img_size = img_size@propertydef use_gpu(self):return self._use_gpu@use_gpu.setterdef use_gpu(self, use_gpu):self._use_gpu = use_gpudef optimize(self, layer, filter_idx, input_=None, num_iter=30):"""Generates an image that maximally activates the target filter.Args:layer (torch.nn.modules.conv.Conv2d): The target Conv2d layer fromwhich the filter to be chosen, based on `filter_idx`.filter_idx (int): The index of the target filter.num_iter (int, optional, default=30): The number of iteration forthe gradient ascent operation.Returns:output (list of torch.Tensor): With dimentions:math:`(num_iter, C, H, W)`. The size of the image isdetermined by `img_size` attribute which defaults to 224."""# Validate the type of the layerif type(layer) != nn.modules.conv.Conv2d:raise TypeError('The layer must be nn.modules.conv.Conv2d.')# Validate filter indexnum_total_filters = layer.out_channelsself._validate_filter_idx(num_total_filters, filter_idx)# Inisialize input (as noise) if not providedif input_ is None:input_ = np.uint8(np.random.uniform(150, 180, (self._img_size, self._img_size, 3)))input_ = apply_transforms(input_, size=self._img_size)if torch.cuda.is_available() and self.use_gpu:self.model = self.model.to('cuda')input_ = input_.to('cuda')# Remove previous hooks if anywhile len(self.handlers) > 0:self.handlers.pop().remove()# Register hooks to record activation and gradientsself.handlers.append(self._register_forward_hooks(layer, filter_idx))self.handlers.append(self._register_backward_hooks())# Inisialize gradientsself.gradients = torch.zeros(input_.shape)# Optimizereturn self._ascent(input_, num_iter)def visualize(self, layer, filter_idxs=None, lr=1., num_iter=30,num_subplots=4, figsize=(4, 4), title='Conv2d',return_output=False):"""Optimizes for the target layer/filter and visualizes the output.A method that combines optimization and visualization. There aremainly 3 types of operations, given a target layer:1. If `filter_idxs` is provided as an integer, it optimizes for thefilter specified and plots the output.2. If `filter_idxs` is provided as a list of integers, it optimizes forall the filters specified and plots the output.3. if `filter_idx` is not provided, i.e. None, it randomly chooses`num_subplots` number of filters from the layer provided andplots the output.It also returns the output of the optimization, if specified with`return_output=True`.Args:layer (torch.nn.modules.conv.Conv2d): The target Conv2d layer fromwhich the filter to be chosen, based on `filter_idx`.filter_idxs (int or list of int, optional, default=None): The indexor indecies of the target filter(s).lr (float, optional, default=.1): The step size of optimization.num_iter (int, optional, default=30): The number of iteration forthe gradient ascent operation.num_subplots (int, optional, default=4): The number of filters tooptimize for and visualize. Relevant in case 3 above.figsize (tuple, optional, default=(4, 4)): The size of the plot.Relevant in case 1 above.title (str, optional default='Conv2d'): The title of the plot.return_output (bool, optional, default=False): Returns theoutput(s) of optimization if set to True.Returns:For a single optimization (i.e. case 1 above):output (list of torch.Tensor): With dimentions:math:`(num_iter, C, H, W)`. The size of the image isdetermined by `img_size` attribute which defaults to 224.For multiple optimization (i.e. case 2 or 3 above):output (list of list of torch.Tensor): With dimentions:math:`(num_subplots, num_iter, C, H, W)`. The size of theimage is determined by `img_size` attribute which defaultsto 224."""self._lr = lrif (type(filter_idxs) == int):self._visualize_filter(layer,filter_idxs,num_iter=num_iter,figsize=figsize,title=title)else:num_total_filters = layer.out_channelsif filter_idxs is None:num_subplots = min(num_total_filters, num_subplots)filter_idxs = np.random.choice(range(num_total_filters),size=num_subplots)self._visualize_filters(layer,filter_idxs,num_iter,len(filter_idxs),title=title)if return_output:return self.output, self.pltdef deepdream(self, img_path, layer, filter_idx, lr=.1, num_iter=20,figsize=(4, 4), title='DeepDream', return_output=False):"""Creates DeepDream.It applies the optimization on the image provided. The image is loadedand made into a torch.Tensor that is compatible as the input to thenetwork.Read the original blog post by Google for more information on`DeepDream <https://ai.googleblog.com/2015/06/inceptionism-going-deeper-into-neural.html>`_.Args:img_path (str): A path to the image you want to apply DeepDream onlayer (torch.nn.modules.conv.Conv2d): The target Conv2d layer fromwhich the filter to be chosen, based on `filter_idx`.filter_idx (int): The index of the target filter.lr (float, optional, default=.1): The step size of optimization.num_iter (int, optional, default=30): The number of iteration forthe gradient ascent operation.figsize (tuple, optional, default=(4, 4)): The size of the plot.Relevant in case 1 above.title (str, optional default='Conv2d'): The title of the plot.return_output (bool, optional, default=False): Returns theoutput(s) of optimization if set to True.Returns:output (list of torch.Tensor): With dimentions:math:`(num_iter, C, H, W)`. The size of the image isdetermined by `img_size` attribute which defaults to 224.""" # noqainput_ = apply_transforms(load_image(img_path), self.img_size)self._lr = lroutput = self.optimize(layer, filter_idx, input_, num_iter=num_iter)plt.figure(figsize=figsize)plt.axis('off')plt.title(title)plt.imshow(format_for_plotting(standardize_and_clip(output[-1],saturation=0.15,brightness=0.7))); # noqaif return_output:return output###################### Private interface ######################def _register_forward_hooks(self, layer, filter_idx):def _record_activation(module, input_, output):self.activation = torch.mean(output[:, filter_idx, :, :])return layer.register_forward_hook(_record_activation)def _register_backward_hooks(self):def _record_gradients(module, grad_in, grad_out):if self.gradients.shape == grad_in[0].shape:self.gradients = grad_in[0]for _, module in self.model.named_modules():if isinstance(module, nn.modules.conv.Conv2d) and \module.in_channels == 3:return module.register_backward_hook(_record_gradients)def _ascent(self, x, num_iter):output = []for i in range(num_iter):self.model(x)self.activation.backward()self.gradients /= (torch.sqrt(torch.mean(torch.mul(self.gradients, self.gradients))) + 1e-5)x = x + self.gradients * self._lroutput.append(x)return outputdef _validate_filter_idx(self, num_filters, filter_idx):if not np.issubdtype(type(filter_idx), np.integer):raise TypeError('Indecies must be integers.')elif (filter_idx < 0) or (filter_idx > num_filters):raise ValueError(f'Filter index must be between 0 and \{num_filters - 1}.')def _visualize_filter(self, layer, filter_idx, num_iter, figsize, title):self.output = self.optimize(layer, filter_idx, num_iter=num_iter)plt.figure(figsize=figsize)plt.axis('off')plt.title(title)plt.imshow(format_for_plotting(standardize_and_clip(self.output[-1],saturation=0.15,brightness=0.7))); # noqadef _visualize_filters(self, layer, filter_idxs, num_iter, num_subplots,title):# Prepare the main plotnum_cols = 4num_rows = int(np.ceil(num_subplots / num_cols))fig = plt.figure(figsize=(16, num_rows * 5))plt.title(title)plt.axis('off')self.output = []# Plot subplotsfor i, filter_idx in enumerate(filter_idxs):output = self.optimize(layer, filter_idx, num_iter=num_iter)self.output.append(output)ax = fig.add_subplot(num_rows, num_cols, i+1)ax.set_xticks([])ax.set_yticks([])ax.set_title(f'filter {filter_idx}')ax.imshow(format_for_plotting(standardize_and_clip(output[-1],saturation=0.15,brightness=0.7)))plt.subplots_adjust(wspace=0, hspace=0); # noqaself.plt = plt```
然后使用以下代码绘图:
import torchvision.models as models
from grad_as import GradientAscentmodel = models.vgg16(pretrained=True) # 这里可以改成其它模型g_ascent = GradientAscent(model.features)# specify layer and filter info
conv5_1 = model.features[24]  # 相应的这里也要改,可以用print(model)代码查看模型结构进行修改
conv5_1_filters = [45, 271, ]vis,plt = g_ascent.visualize(conv5_1, conv5_1_filters, title="VGG16: conv5_1",return_output=True)plt.show()
报错解决
报错如下
from importlib_resources import path
ImportError: cannot import name 'path' from 'importlib_resources'
找到报错处的源文件,尝试在代码中手动导入 path,而不是从 importlib_resources 直接导入:
from importlib_resources import path
替换为:
from importlib_resources import filesdef path(package, resource):return files(package).joinpath(resource)
这样,代码将使用 files 函数来导入 path,而不是直接从 importlib_resources 中导入。
总结
以上代码均经过本人亲测可用。