网站建设与推广的销售链接生成器
Android AIDL之详细使用
- 一级目录
- 概述
- 使用场景
- 语法相关
- 编码实践
- 服务端:
- java文件
- 修改AndroidManifest
- 客户端
- 坑
一级目录
概述
AIDL叫Android接口定义语言,是用于辅助开发者完成Android跨进程编程的工具。
从某种意义上说AIDL其实是一个模板,因为在使用过程中,实际起作用的并不是AIDL文件,而是据此而生成的一个IInterface的实例代码,AIDL其实是为了避免我们重复编写代码而出现的一个模板。
设计AIDL这门语言的目的就是为了实现进程间通信。在Android系统中,每个进程都运行在一块独立的内存中,在其中完成自己的各项活动,与其他进程都分隔开来。可是有时候我们又有应用间进行互动的需求,比较传递数据或者任务委托等,AIDL就是为了满足这种需求而诞生的。通过AIDL,可以在一个进程中获取另一个进程的数据和调用其暴露出来的方法,从而满足进程间通信的需求
通常,暴露方法给其他应用进行调用的应用称为服务端,调用其他应用的方法的应用称为客户端,客户端通过绑定服务端的Service来进行交互
使用场景
-
App开发中,webview的优化是个绕不开的,而且与native的相互通信经常会碰到crash情况,webview写到一个单独的进程中,通过aidl通信,就很大程度上避免了这种情况;
-
现在车机开发需求比较大,车机上的app相互通信的情况是比较多的,尤其是与语音的交互,只要需要让语音操作的App都是需要暴露接口给语音模块的;一般的暴露接口都是需要AIDL的方式来暴露;
语法相关
AIDL的语法十分简单,与Java语言基本保持一致,但是需要记住以下几点规则:
-
AIDL文件以 .aidl 为后缀名
-
AIDL支持的数据类型分为如下几种:
- 八种基本数据类型:byte、char、short、int、long、float、double、boolean
- String,CharSequence
- 实现了Parcelable接口的数据类型
- List 类型。List承载的数据必须是AIDL支持的类型,或者是其它声明的AIDL对象
- Map类型。Map承载的数据必须是AIDL支持的类型,或者是其它声明的AIDL对象
- 实现了Parcelable接口的数据类型
-
AIDL文件可以分为两类。一类用来声明实现了Parcelable接口的数据类型,以供其他AIDL文件使用那些非默认支持的数据类型。还有一类是用来定义接口方法,声明要暴露哪些接口给客户端调用,定向Tag就是用来标注这些方法的参数值
-
定向Tag。定向Tag表示在跨进程通信中数据的流向,用于标注方法的参数值,分为 in、out、inout 三种。其中 in 表示数据只能由客户端流向服务端, out 表示数据只能由服务端流向客户端,而 inout 则表示数据可在服务端与客户端之间双向流通。此外,如果AIDL方法接口的参数值类型是:基本数据类型、String、CharSequence或者其他AIDL文件定义的方法接口,那么这些参数值的定向 Tag 默认是且只能是 in,所以除了这些类型外,其他参数值都需要明确标注使用哪种定向Tag。
-
明确导包。在AIDL文件中需要明确标明引用到的数据类型所在的包名,即使两个文件处在同个包名下
编码实践
纸上得来终觉浅,绝知此事要躬行,show your the code;客户端通过绑定服务端的Service的方式来调用服务端的方法,实现模拟登录,获取书籍详情的的功能,实现应用间的数据共享。
服务端:
java文件
先把 service 创建出来
public class AIDLService extends Service {@Nullable@Overridepublic IBinder onBind(Intent intent) {return null;}
}
新建一个工程,包名就定义为 com.ze.aidlservice
首先,在应用中需要用到一个 Book 类,而 Book 类是两个应用间都需要使用到的,所以也需要在AIDL文件中声明Book类,为了避免出现类名重复导致无法创建文件的错误,这里需要先建立 BookManager AIDL 文件,之后再创建 Book 类
右键点击app新建一个AIDL文件,命名为 IMyBookManager。
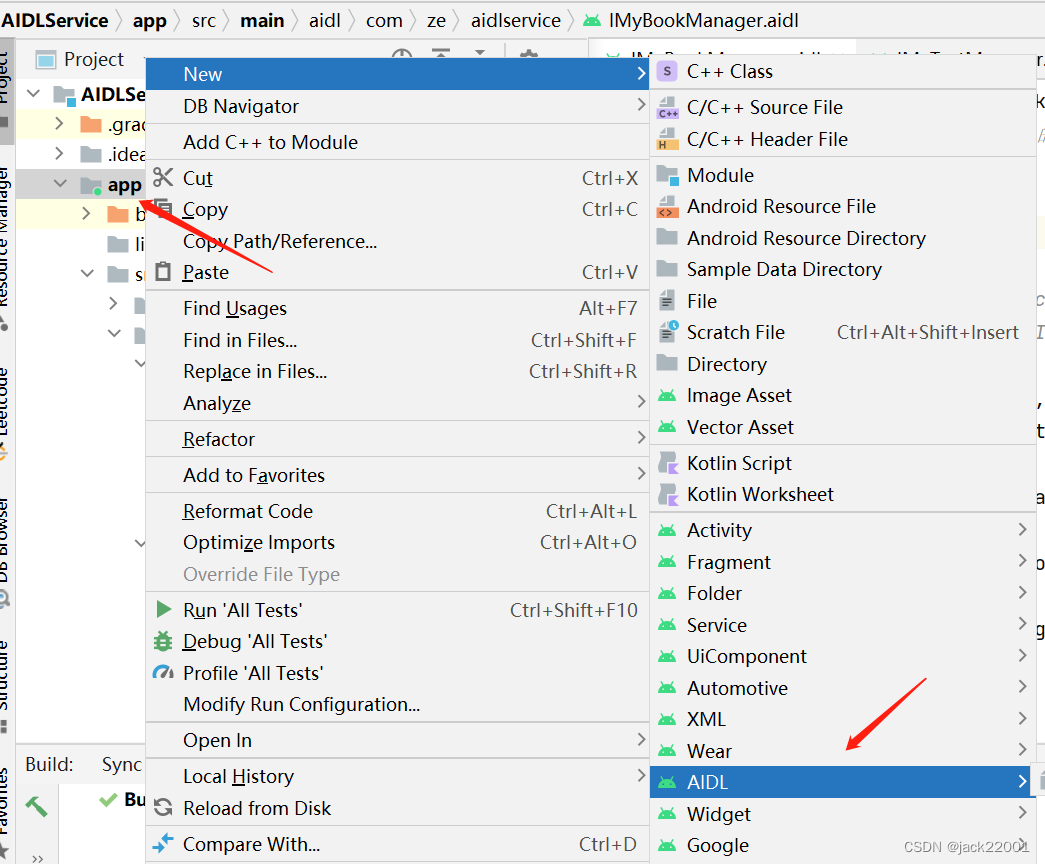
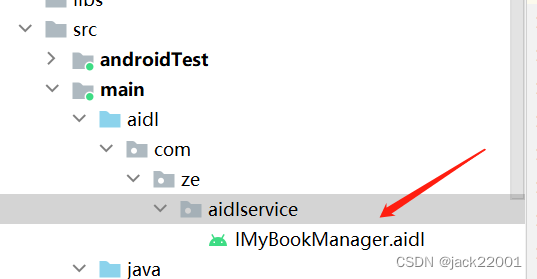
会自动在main目录下生成IMyBookManager aidl文件;
然后我们来定义Book类,包含两个属性,name和price;
public class Book implements Parcelable {private int price;private String name = "";public Book(){}protected Book(Parcel in) {price = in.readInt();name = in.readString();}public int getPrice() {return price;}public void setPrice(int price) {this.price = price;}public String getName() {return name;}public void setName(String name) {this.name = name;}@Overridepublic int describeContents() {return 0;}public static final Creator<Book> CREATOR = new Creator<Book>() {@Overridepublic Book createFromParcel(Parcel in) {return new Book(in);}@Overridepublic Book[] newArray(int size) {return new Book[size];}};@Overridepublic String toString() {return "\n图书名称:" + name + "\n图书价格:" + price;}@Overridepublic void writeToParcel(Parcel dest, int flags) {dest.writeInt(price);dest.writeString(name);}
}
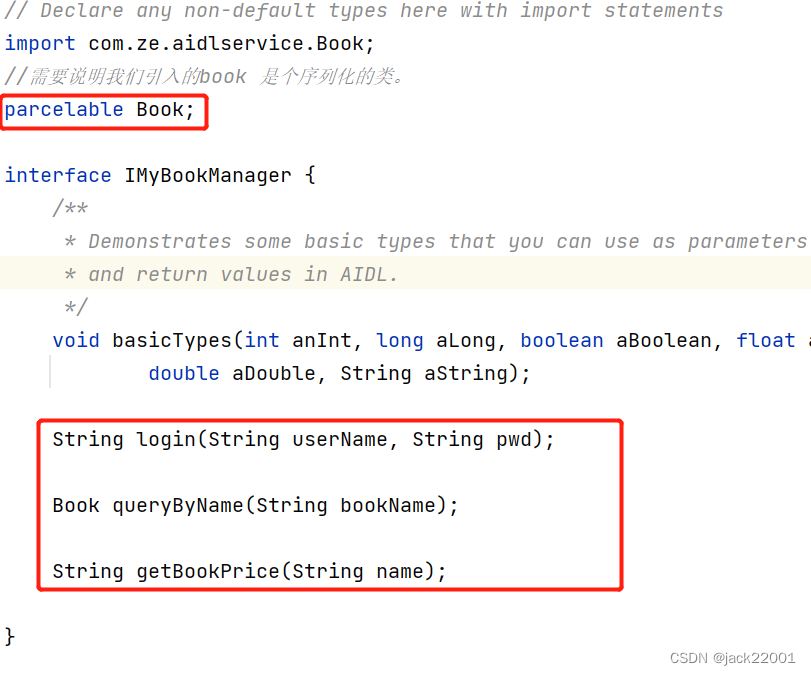
然后修改IMyBookManager.aidl文件,增加了三个方法,和一个Book的声明,包括服务端需要暴露给客户端一个登录接口,和获取书籍详情,获取书籍价格的方法。
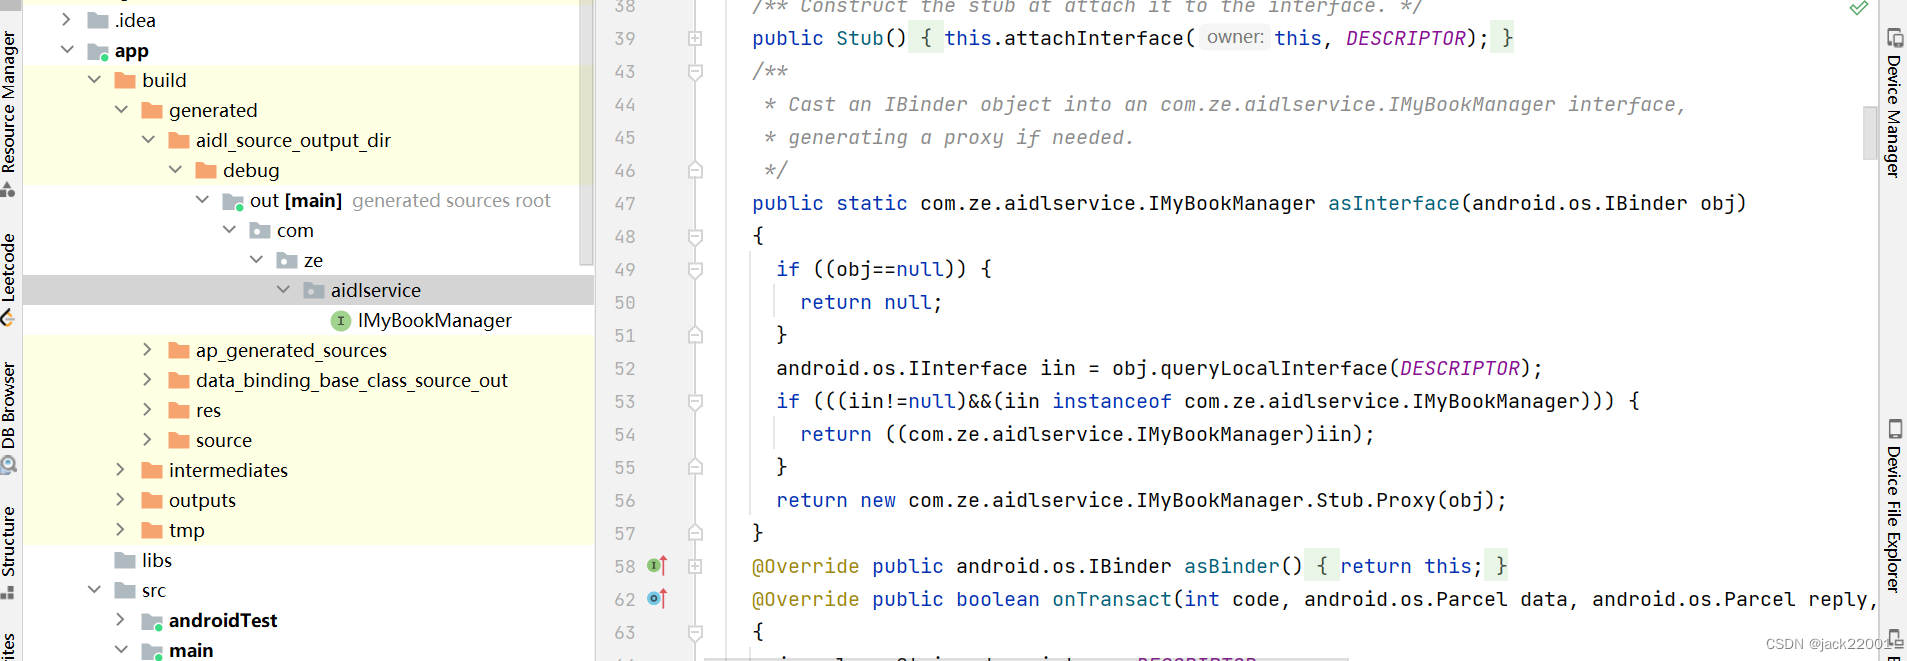
上面说过,在进程间通信中真正起作用的并不是 AIDL 文件,而是系统据此而生成的文件,可以在以下目录中查看系统生成的文件。之后需要使用到当中的内部静态抽象类 Stub
创建或修改过AIDL文件后需要重新makeproject下工程,使系统及时生成我们需要的文件;
现在修改 AIDLService供客户端远程绑定了。
public class AIDLService extends Service {MyBookManager bookManager = new MyBookManager();public AIDLService() {Log.d("jackie","service,AIDLService");}@Nullable@Overridepublic IBinder onBind(Intent intent) {Log.d("jackie","service,onbind");return bookManager;}public class MyBookManager extends IMyBookManager.Stub{@Overridepublic void basicTypes(int anInt, long aLong, boolean aBoolean, float aFloat, double aDouble, String aString) throws RemoteException {}@Overridepublic String login(String userName, String pwd) throws RemoteException {Log.d("jackie","service,login");if(userName.equalsIgnoreCase("admin") && pwd.equalsIgnoreCase("123456")){return "success";}return "error";}@Overridepublic Book queryByName(String bookName) throws RemoteException {Log.d("jackie","service,queryByName");Book book = new Book();book.setName(bookName);book.setPrice(100);return book;}@Overridepublic String getBookPrice(String name) throws RemoteException {return name+" :30";}}
}
可以看到, onBind 方法返回的就是 IMyBookManager.Stub 对象,实现当中定义的三个方法。
修改AndroidManifest
客户端要能够找到这个Service,可以通过先指定包名,之后再配置Action值或者直接指定Service类名的方式来绑定Service
如果是通过指定Action值的方式来绑定Service,那还需要将Service的声明改为如下所示:
<serviceandroid:name="com.ze.aidlservice.service.AIDLService"android:enabled="true"android:exported="true"android:process=":remote"><intent-filter><action android:name="com.ze.aidlservice.bookService"/><category android:name="android.intent.category.DEFAULT" /></intent-filter></service>
| 标签名 | 含义 |
|---|---|
| android:enabled | 该服务能否被实例化,默认为true |
| android:exported | 其他应用的组件能否和这个服务交互 |
| 导android:process | 设置独立进程,例如 remote 则进程名为 包名:remote |
我们采用配置 Action 的方案。
还有个需要特别需要注意的点:从Android 11 开始 系统对app的可见性进行了保护,只有部分应用可见所有app。如果系统是11以上,需要在AndroidManifest里面声明
<queries><package android:name="com.ze.aidlservice" /><intent><action android:name="com.ze.aidlservice.bookService" /></intent></queries>
客户端
创建新的工程,包名:com.ze.aidlclient;
首先,需要把服务端的AIDL文件以及Book类复制过来,将 aidl 文件夹整个复制到和Java文件夹同个层级下,不需要改动任何代码。
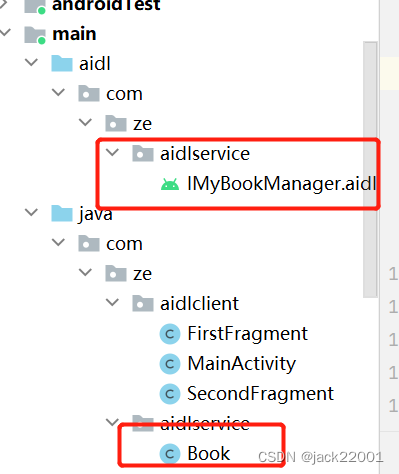
注意:Book类所在的包名要与服务的的包名相同。
布局文件:
<?xml version="1.0" encoding="utf-8"?>
<androidx.constraintlayout.widget.ConstraintLayout xmlns:android="http://schemas.android.com/apk/res/android"xmlns:app="http://schemas.android.com/apk/res-auto"xmlns:tools="http://schemas.android.com/tools"android:layout_width="match_parent"android:layout_height="match_parent"tools:context=".FirstFragment"><Buttonandroid:id="@+id/btnConnection"android:layout_width="wrap_content"android:layout_height="wrap_content"android:layout_marginStart="140dp"android:layout_marginTop="52dp"android:text="连接服务测试"app:layout_constraintStart_toStartOf="parent"app:layout_constraintTop_toTopOf="parent"android:layout_marginLeft="140dp" /><TextViewandroid:id="@+id/textView2"android:layout_width="wrap_content"android:layout_height="wrap_content"android:layout_marginStart="56dp"android:layout_marginLeft="56dp"android:layout_marginTop="156dp"android:text="账户:"app:layout_constraintStart_toStartOf="parent"app:layout_constraintTop_toTopOf="parent" /><TextViewandroid:id="@+id/textView3"android:layout_width="wrap_content"android:layout_height="wrap_content"android:layout_marginStart="4dp"android:layout_marginLeft="4dp"android:layout_marginTop="52dp"android:text="密码:"app:layout_constraintStart_toStartOf="@+id/textView2"app:layout_constraintTop_toBottomOf="@+id/textView2" /><EditTextandroid:id="@+id/etName"android:layout_width="wrap_content"android:layout_height="wrap_content"android:ems="10"android:hint="用户名"android:inputType="textPersonName"app:layout_constraintBottom_toBottomOf="@+id/textView2"app:layout_constraintStart_toEndOf="@+id/textView2"app:layout_constraintTop_toTopOf="@+id/textView2" /><EditTextandroid:id="@+id/etPwd"android:layout_width="wrap_content"android:layout_height="wrap_content"android:ems="10"android:hint="密码"android:inputType="textPassword"app:layout_constraintBottom_toBottomOf="@+id/textView3"app:layout_constraintStart_toStartOf="@+id/etName"app:layout_constraintTop_toTopOf="@+id/textView3" /><Buttonandroid:id="@+id/btnLogin"android:layout_width="wrap_content"android:layout_height="wrap_content"android:layout_marginStart="160dp"android:layout_marginLeft="160dp"android:layout_marginTop="40dp"android:text="登录"app:layout_constraintStart_toStartOf="parent"app:layout_constraintTop_toBottomOf="@+id/textView3" /><TextViewandroid:id="@+id/tvBookInfo"android:scrollbarStyle="outsideInset"android:layout_width="303dp"android:layout_height="141dp"android:layout_marginTop="36dp"android:gravity="start|top"android:text="查询到的图书信息:"android:textSize="16dp"android:maxLines="5"app:layout_constraintEnd_toEndOf="parent"app:layout_constraintHorizontal_bias="0.555"app:layout_constraintStart_toStartOf="parent"app:layout_constraintTop_toBottomOf="@+id/etBookName" /><TextViewandroid:id="@+id/textView5"android:layout_width="wrap_content"android:layout_height="wrap_content"android:layout_marginStart="16dp"android:layout_marginTop="60dp"android:text="书名:"app:layout_constraintStart_toStartOf="parent"app:layout_constraintTop_toBottomOf="@+id/btnLogin"android:layout_marginLeft="16dp" /><Buttonandroid:id="@+id/btnQuery"android:layout_width="wrap_content"android:layout_height="wrap_content"android:layout_marginStart="20dp"android:layout_marginLeft="20dp"android:text="查询"app:layout_constraintBottom_toBottomOf="@+id/textView5"app:layout_constraintStart_toEndOf="@+id/etBookName"app:layout_constraintTop_toTopOf="@+id/textView5"app:layout_constraintVertical_bias="0.517" /><EditTextandroid:id="@+id/etBookName"android:layout_width="wrap_content"android:layout_height="wrap_content"android:layout_marginStart="4dp"android:layout_marginLeft="4dp"android:ems="10"android:hint="输入要查询的书名"android:inputType="textPersonName"app:layout_constraintBottom_toBottomOf="@+id/textView5"app:layout_constraintStart_toEndOf="@+id/textView5"app:layout_constraintTop_toTopOf="@+id/textView5"app:layout_constraintVertical_bias="0.538" /></androidx.constraintlayout.widget.ConstraintLayout>
核心代码:
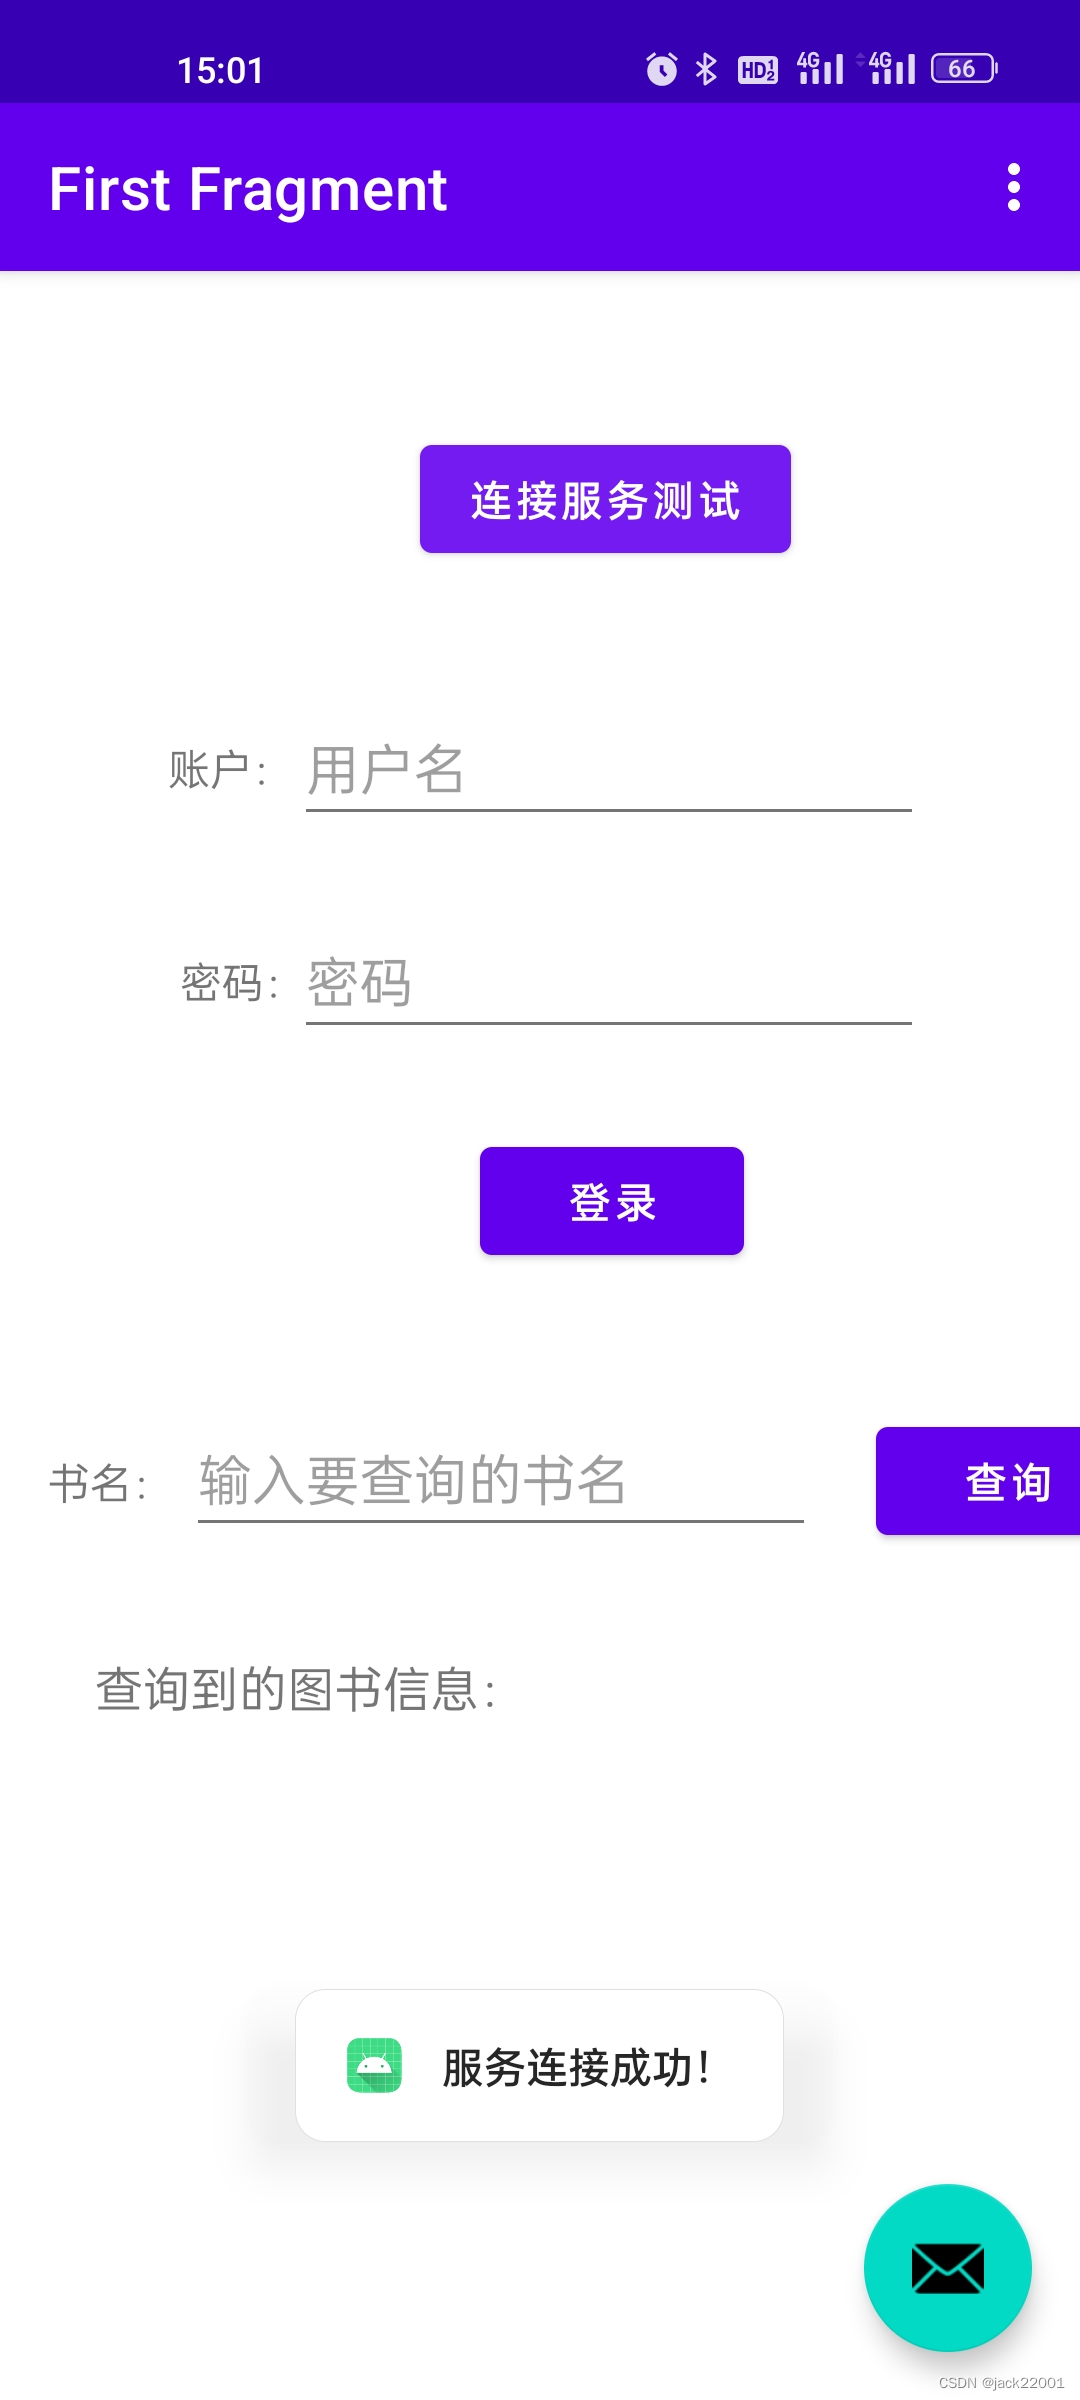
public class FirstFragment extends Fragment {private FragmentFirstBinding binding;private boolean islogin=false;private IMyBookManager bookManager = null;private ServiceConnection conn = new ServiceConnection() {@Overridepublic void onServiceConnected(ComponentName name, IBinder service) {Log.d("jackie","client,onServiceConnected");bookManager = IMyBookManager.Stub.asInterface(service);Toast.makeText(getContext(), "服务连接成功!", Toast.LENGTH_SHORT).show();}@Overridepublic void onServiceDisconnected(ComponentName name) {Log.d("jackie","client,onServiceDisconnected");bookManager = null;}};@Overridepublic View onCreateView(LayoutInflater inflater, ViewGroup container,Bundle savedInstanceState) {binding = FragmentFirstBinding.inflate(inflater, container, false);return binding.getRoot();}private void connect() {binding.btnConnection.setOnClickListener(new View.OnClickListener() {@Overridepublic void onClick(View v) {Log.d("jackie","client,btnConnection click");if (bookManager != null) {Log.d("jackie","client,btnConnection click bookManager != null");Toast.makeText(getContext(), "服务连接成功!", Toast.LENGTH_SHORT).show();} else {Log.d("jackie","client,btnConnection click bookManager == null");Intent intent = new Intent();intent.setAction("com.ze.aidlservice.bookService");intent.setPackage("com.ze.aidlservice");
// intent.setComponent(new ComponentName("com.yunzhou.aidlserver", "com.yunzhou.aidlserver.MyAidlService"));
// intent.setComponent(new ComponentName("com.ze.aidlservice","com.ze.aidlservice.Service.AIDLService"));
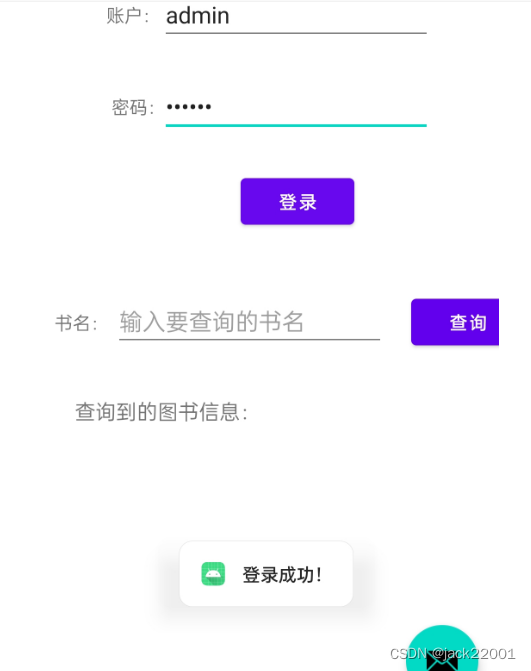
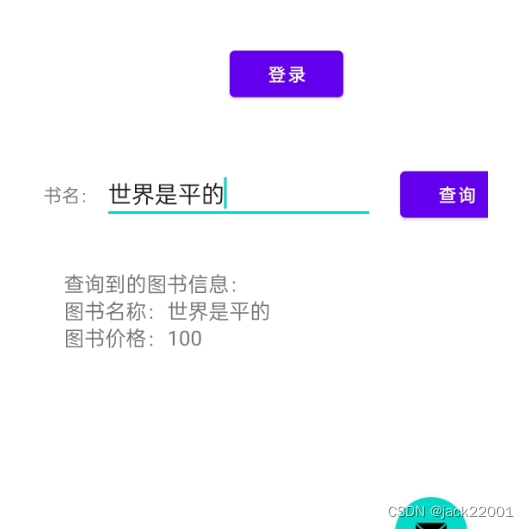
// getContext().bindService(intent, conn, Context.BIND_AUTO_CREATE);boolean isConnet = getContext().bindService(intent, conn, Context.BIND_AUTO_CREATE);Log.d("jackie","isConnet:::"+isConnet);}}});binding.btnLogin.setOnClickListener(new View.OnClickListener() {@Overridepublic void onClick(View v) {if(bookManager == null){Toast.makeText(getContext(), "还没有绑定服务!", Toast.LENGTH_SHORT).show();return;}if(binding.etName.getText().toString().isEmpty() || binding.etPwd.getText().toString().isEmpty()){Toast.makeText(getContext(), "用户名或密码不能为空!", Toast.LENGTH_SHORT).show();return;}try {String resStr = bookManager.login(binding.etName.getText().toString(),binding.etPwd.getText().toString());if(resStr.compareToIgnoreCase("success") == 0){islogin=true;Toast.makeText(getContext(), "登录成功!", Toast.LENGTH_SHORT).show();} else{Toast.makeText(getContext(), "登录失败!", Toast.LENGTH_SHORT).show();throw new RemoteException("登录失败");}} catch (RemoteException e) {e.printStackTrace();Toast.makeText(getContext(), "登录失败!", Toast.LENGTH_SHORT).show();}}});binding.btnQuery.setOnClickListener(new View.OnClickListener() {@Overridepublic void onClick(View v) {if(bookManager == null && islogin ){Toast.makeText(getContext(), "请先绑定服务并登录!", Toast.LENGTH_LONG).show();return;}if(binding.etBookName.getText().toString().isEmpty()){Toast.makeText(getContext(), "请输入您要查找的图书!", Toast.LENGTH_LONG).show();return;}try {Book book = bookManager.queryByName(binding.etBookName.getText().toString());String price = bookManager.getBookPrice("jackie");if(book != null){binding.tvBookInfo.append(book.toString());// binding.tvBookInfo.append(price);} else{throw new RemoteException("查询失败!");}} catch (RemoteException e) {e.printStackTrace();binding.tvBookInfo.append("查询失败!");}}});}public void onViewCreated(@NonNull View view, Bundle savedInstanceState) {super.onViewCreated(view, savedInstanceState);connect();}@Overridepublic void onDestroyView() {super.onDestroyView();binding = null;}}
测试结果:
我们说一下定向tag:
AIDL 定义的接口文件,使用 in、out、inout 方向标签表明数据流向:
原始类型、String、IBinder 参数以及 AIDL 生成的接口参数 只能 用 in 修饰,可以不显式地写出来。
其他类型参数,主要是 Parcel 类型和 List、Map 类型,支持 out、inout,必须显式写出来。
大家只要自己试一下这些参数,并 Build 生成下 Java 文件,就可以发现它们的区别:
- in:Proxy 端流向 Stub 端,Proxy 端将数据写入 Parcel,通过 BinderDriver 后,Stub 端从 Parcel 中读取。
- out:Stub 端流向 Proxy 端,Proxy 端不传递此参数,Stub 端创建实例,执行方法后,将更新后的参数写入 Parcel,Proxy 端从 Parcel 中先读取 Reply,再读取更新后的参数。
- inout:Proxy 端写入,Stub 端读取后,执行方法,将更新后的参数传回,Proxy 再读取更新后的参数。
可以参考「Android Binder」AIDL中的 in / out 到底是啥?
坑
最后在强调一下:
从Android 11 开始 系统对app的可见性进行了保护,只有部分应用可见所有app。如果系统是11以上,需要在AndroidManifest里面声明queries,要不然客户端会拉不起服务。
讲到这里基本使用已经讲完,喜欢的点赞支持!